We are grateful for your interest in contributing to CopilotKit. We welcome new contributors and appreciate your help in making CopilotKit better.
This guide will help you get started as smoothly as possible.
## Step 1: Install Prerequisites
- [Node.js](https://nodejs.org/en/) 20.x or later
- [pnpm](https://pnpm.io/) v9.x installed globally (`npm i -g pnpm@^9`)
- [Turborepo v2.x](https://turborepo.org/) installed globally (`npm i -g turbo@2`)
## Step 2: Repository Setup
### Fork The Repository
First, head over to the [CopilotKit repository](https://github.com/CopilotKit/CopilotKit) and create a fork.
Then, clone your fork to your local machine:
```bash
git clone https://github.com//CopilotKit
cd CopilotKit
```
### Install Dependencies
The CopilotKit repository is a monorepo based on [Turborepo](https://turborepo.org/).
We use [pnpm](https://pnpm.io/) as our package manager.
Install the dependencies using pnpm:
```bash
pnpm install
```
### Build Packages
To make sure everything works, let's build all packages once:
```bash
turbo run build
```
## Step 3: Development Mode
Now that everything is set up and works as expected, you can get started developing:
```bash
# Start all packages in development mode
turbo run dev
# Start a specific package in development mode
turbo run dev --filter="@copilotkit/package-name"
```
Now you can start making changes to the code.
You can find all `@copilotkit/*` packages under the `packages` folder of the monorepo.
## Step 4: Test Changes in Real-Time
In most cases, you want to seamlessly be able to test your changes in real-time as you develop.
We have an `examples` folder in the monorepo with a few different examples using CopilotKit. You can run these examples to test your changes, as they are linked to the `@copilotkit/*` packages in the monorepo.
For this tutorial, we'll use the `next-openai` example, specifically the Presentation Demo (`/presentation`).
In a separate terminal, run the following command to start the example:
```bash
cd examples/next-openai
export OPENAI_API_KEY=
pnpm run example-dev
```
We use the `pnpm run example-dev` command to run examples, which is different from the `turbo run dev` command we use to work on the individual packages.
Now navigate to http://localhost:3000/presentation and you should see the example running. Any changes you make to the CopilotKit packages will immediately be reflected here.
## Step 5: Formatting and Linting
Before committing your changes, ensure your files are formatted properly by running the following at the root of the monorepo:
```bash
turbo run format
```
Additionally, ensure you have no linting errors:
```bash
turbo run lint
```
## Step 6: Submit a Pull Request
Now that you've made your changes, commit and push them. Then, simply head over to the [Pull Requests page](https://github.com/CopilotKit/CopilotKit/pulls) and create a pull request. Well done!
## Starting a dev environment with hot reload
CopilotKit contains a ready-made script for starting a development environment based on one of the CoAgent examples. It lets you work on CopilotKit internals in the core Typescript and Python code while seeing your changes applied to the chosen example.
As a prerequisite, make sure you have GNU parallel and langgraph CLI installed.
Next, go to the `CopilotKit/` directory and run the `example.sh` script for the example you want to work on:
```bash
./scripts/develop/example.sh coagents-starter
```
This will start a development environment with hot reload.
You can optionally run the same example on LangGraph platform by running:
```bash
./scripts/develop/example.sh coagents-starter langgraph-platform
```
## Debugging
Every time you run CopilotKit on localhost, you will be able to see the **CopilotKit Dev Console** in the chat window. The Dev Console provides you with useful functionality to debug your copilot (e.g. see what state the copilot is aware of, actions it can perform, etc).
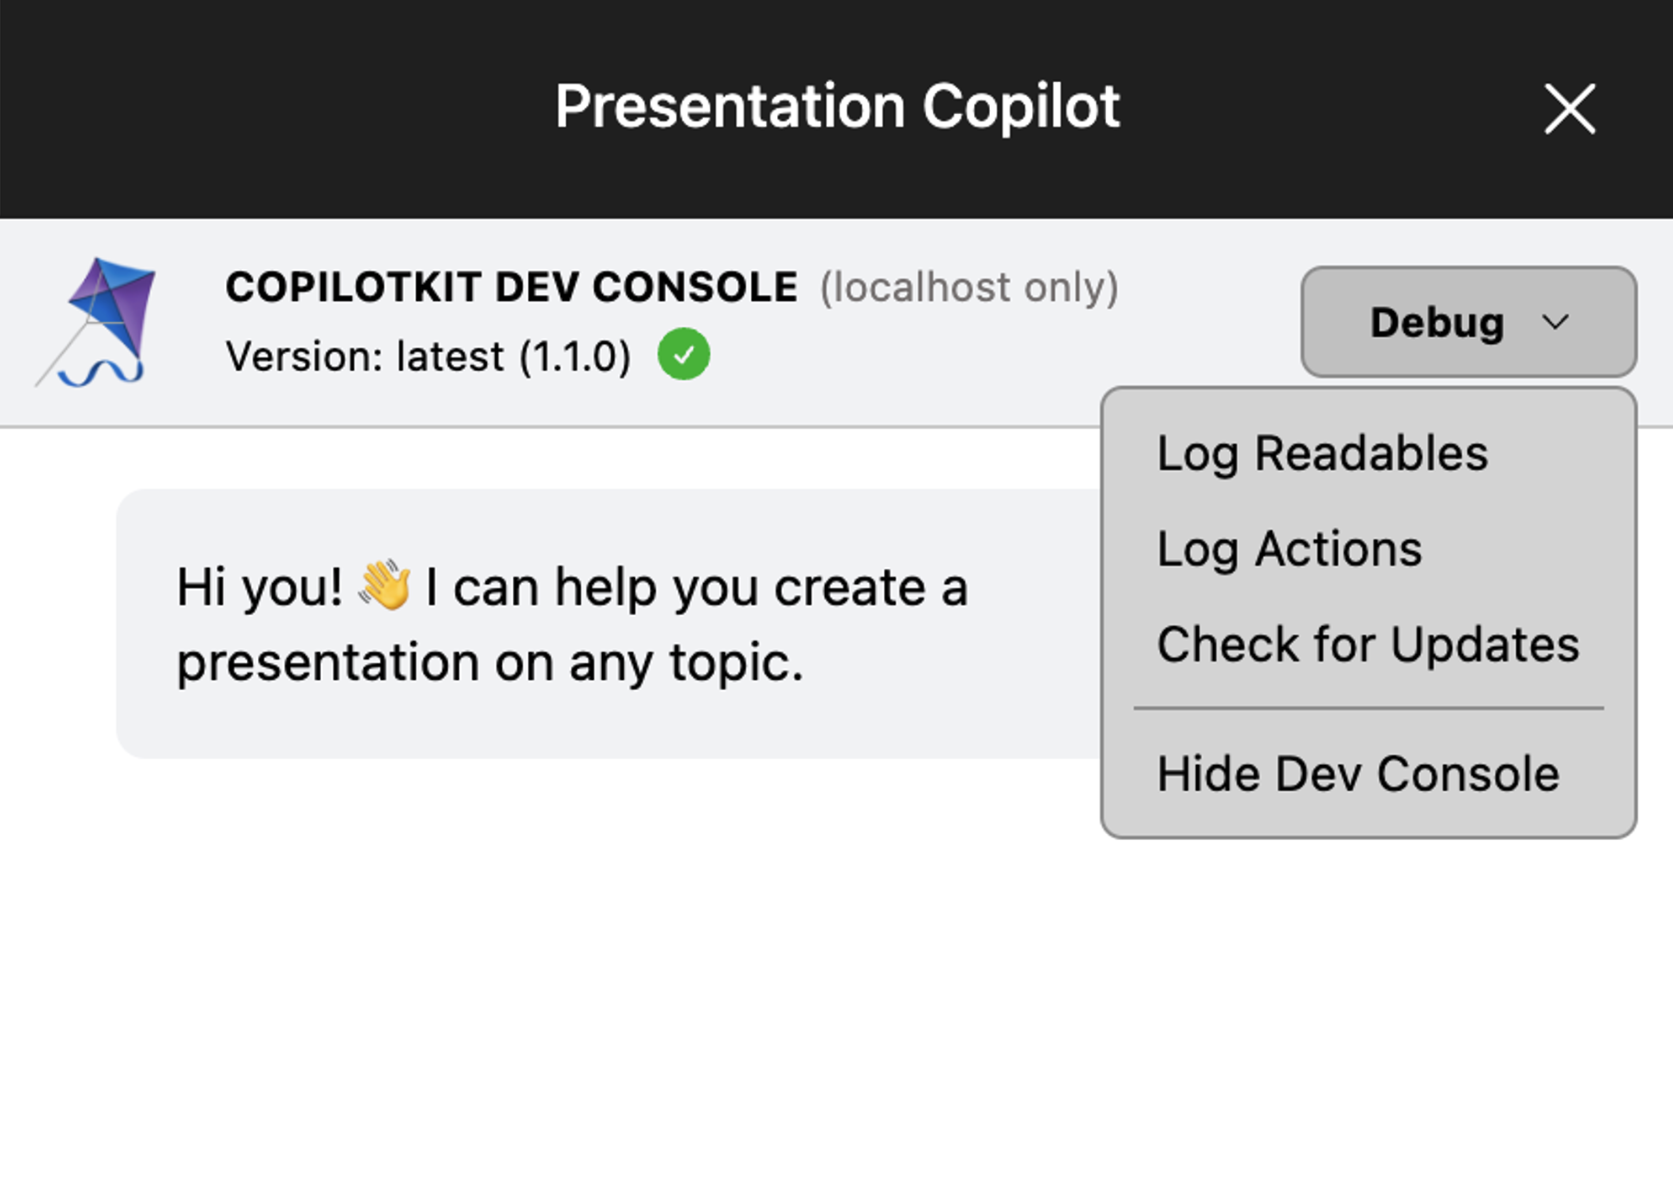 If you'd like to disable the Dev Console locally, simply set `showDevConsole` to `false` in your `` provider.
## (Advanced) Package Linking
In some cases, you want to test your CopilotKit changes in your own project. For example, you tried to integrate CopilotKit into your own codebase and encountered a bug you want to fix.
Conveniently, you can link your local CopilotKit packages to your own project to test your changes.
Check out the [Advanced: Package Linking](/contributing/code-contributions/package-linking) guide to learn how to do that.
## Need help?
If you need help with anything, please don't hesitate to reach out to us on [Discord](https://discord.gg/6dffbvGU3D). We have a dedicated [#contributing](https://discord.com/channels/1122926057641742418/1183863183149117561) channel.
If you'd like to disable the Dev Console locally, simply set `showDevConsole` to `false` in your `` provider.
## (Advanced) Package Linking
In some cases, you want to test your CopilotKit changes in your own project. For example, you tried to integrate CopilotKit into your own codebase and encountered a bug you want to fix.
Conveniently, you can link your local CopilotKit packages to your own project to test your changes.
Check out the [Advanced: Package Linking](/contributing/code-contributions/package-linking) guide to learn how to do that.
## Need help?
If you need help with anything, please don't hesitate to reach out to us on [Discord](https://discord.gg/6dffbvGU3D). We have a dedicated [#contributing](https://discord.com/channels/1122926057641742418/1183863183149117561) channel.